Our 3 boys have an extensive list of activities that they participate in after school and on the weekends. With that, comes all of the stuff that needs to be prepared for the activities. Swim school? Need a bathing suit, towel and goggles. Ninja Academy? Must wear my sneakers. As a parent, it is mentally draining to try and keep track (RE: Moms and the “mental load”). Because of this, I crafted a way for my sons to begin to learn how to plan for their activities and take the responsibility and ownership of organizing for them.
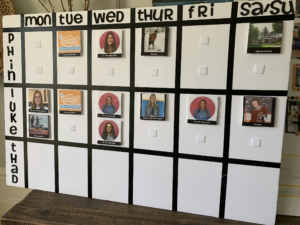
I created a visual weekly activity schedule:

This schedule allows the boys to take a moment in the morning and reference what they have after school. Take time to talk about what they will need (guided questions, not me telling them ex: Me: What do you need for swim? Child: My swim suit!) and how to organize their belongings. These steps allow them to start to learn that a swimsuit doesn’t just magically appear in a bag when they get there, but rather, that mommy has packed it because she planned ahead. This chart will start to push that planning on to them and help them when the demands begin to increase on their need for independence in school.
I used photos of them, the location, people they work with or logo, because it allows them to start imagining in their mind what it looks like there and who they work with. I find that often people do icons (which is great, right?) but it takes the experience of picturing it in your head. When I look at them in the hockey gear I can see in my mind the hockey rink and where they enter the ice. This is what I want them to start experiencing and learning so that they can translate this to when they have to write a paper one day…
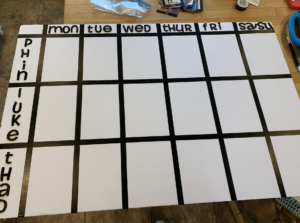
Making the board was super easy:
- Gather Supplies (Staples, ya feel me?)
- Foam Board (Staples)
- Xacto Knife (Staples)
- Velcro (Staples)
- Scotch Expressions Washi Tape (Staples)
- Letter Stickers (Staples – mine are only 1’’ and are not on their website, linking something similar)
- Photos of them either doing the activity or the building/logo of the activity
2. Cut the flaps off of your presentation board (you will use these later)
3. Space out for at least 2 activities for each child (a line for each child, no combos even if they do things together) and mark with your black tape – I just eye-balled it because no one has time to have perfect measurements in this household.

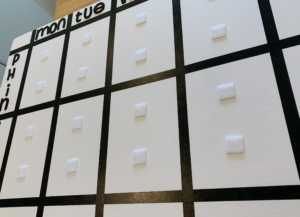
4. Place the 2 velcro tabs in each box

Making the activity cards:
- Using the excess board that you cut off before, glue the pictures down (you can do all of them right next to each other)
- Using the Xacto Knife, cut the squares out.
- Adhere the other side of the velcro to your activity card.
As activities change (just like the seasons… le sigh) you can remove them and store them in a ziplock back that is taped to the back. Maybe you do not have something 1 week because of a holiday, together, remove it from the board. Use the board as a tool to engage the conversation for your little to plan, organize, manage time and build their executive functions.

Leave A Comment